Overview
In order for Power Automate to query and update the DynamicPoint EasyAP365 Invoice Automation app, a custom connector is provided. This article outlines the steps to deploy this custom connector to your Power Automate environment.
Create the Custom Connector
- Download Custom Connector
- Login to the Power Automate application at https://make.powerautomate.com/
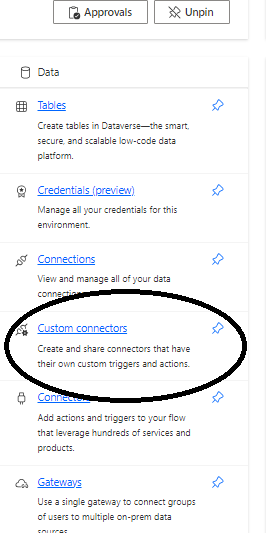
- Go to More – Discover All

- Under the Data section select Custom Connectors
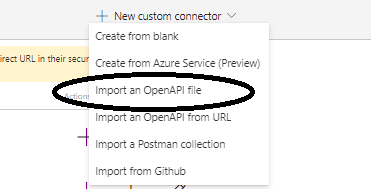
- Click New Connector and Select Import an OpenAPI File
- Name the Connector “DynamicPoint EasyAP365” and select the file downloaded in the first step

- To complete the setup, a client secret will need to be generated. This must be completed by DynamicPoint and will be provided to you.
- On the second step, 2. Security, complete the following:
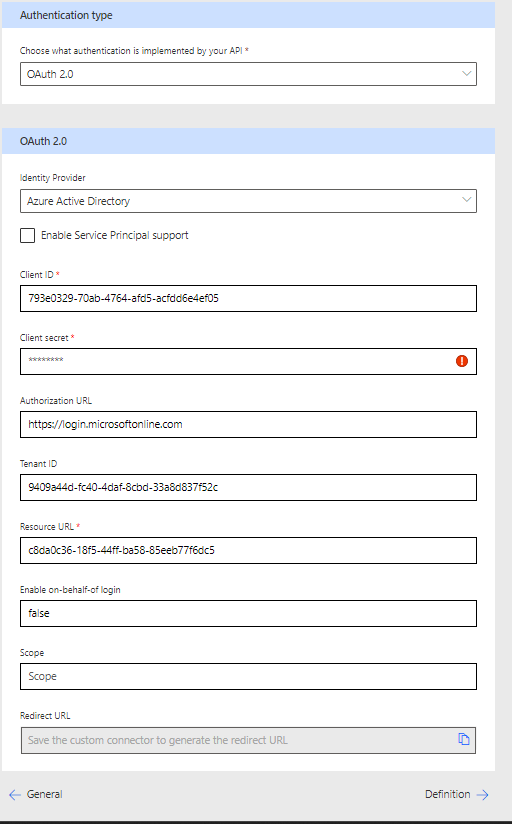
Client Secret = Use the secret obtained in the previous step and provided by DynamicPoint
Login Url = https://login.microsoftonline.com
Tenant Id = 9409a44d-fc40-4daf-8cbd-33a8d837f52c
Resource Url = c8da0c36-18f5-44ff-ba58-85eeb77f6dc5 - Upon saving a Redirect URL will be created:

- This URL will need to be copied and provided to DyamicPoint such that it can be added to the Azure app registration redirects.
Connecting to the Custom Connector
Create the Custom Connector for your Power Automate Flow using the following credentials:
- Username: noreply@dynamicpoint.com
- Password: <Obtained from DynamicPoint>