1 Overview
This tutorial describes how to enable Site.Selected permission with Full Control to a SharePoint site collection. This is needed by EasyAP365 and EasyEXP365 applications for certain elevated operations in the background, like managing list security.
2 Prerequisites
An app registration in Azure is needed. The standard permission configuration is like this:
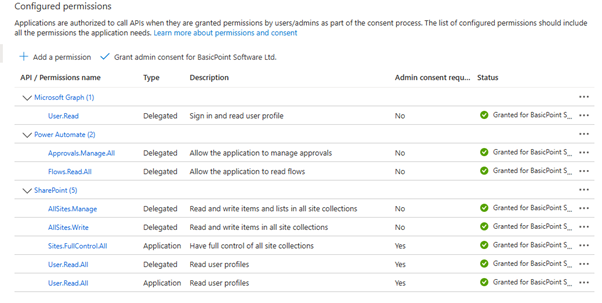
For our standard configuration, the elevated security Sites.FullControl.All permission is configured.
Drawback: EasyAP365 and EasyEXP365 access only the site collection where the application is deployed and configured, but in general this permission allows full control to all site collections in the current Azure tenant for both applications.
Site.Selected is a newly added permission by Microsoft that aims to resolve exactly this problem.
3 Configuration
Azure
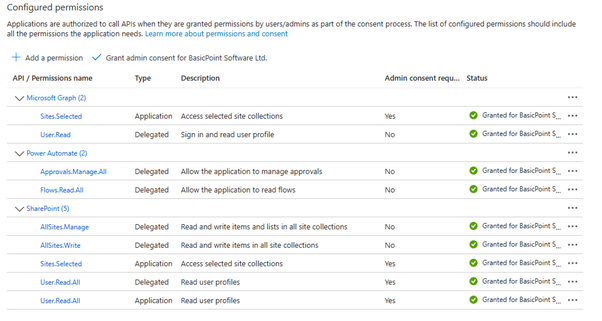
- To use Site.Selected permission we need to first remove the Sites.FullControl.All permission
- Next we need to add Graph -> Application -Site.Selected and SharePoint -> Application -> Site.Selected
- The resulting configuration looks as follows:
PowerShell
Next step is to provide Full Control role to a specific site collection for the above site collection. This must be accomplished using PowerShell.
Install PowerShell
- Install PowerShell – PowerShell 7 is needed for this solution to work. This can be downloaded from here.
Script
- Download the Microsoft provided script from this article or obtain it here.
- Save the script file from the GitHub repository to a local folder
- Run PowerShell 7 console.
- Navigate to the location and run the script

- The script will start installing its required modules:

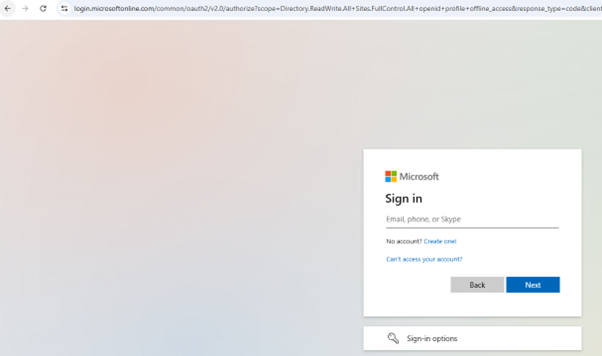
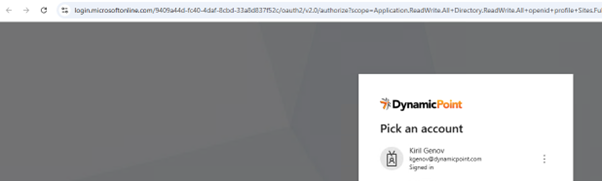
- Then it will open a browser and ask the current user to sign in:
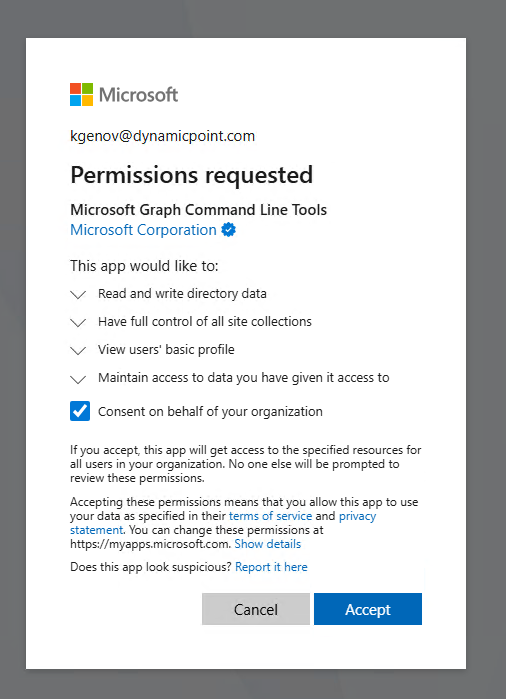
- On successful sign-in it will ask for consent to permissions which are required for the script to perform its actions:
If you Get An Error
If you happen to get a warning that looks like this:

- To resolve, in File Explorer, find the script, right click on it and click on Properties:
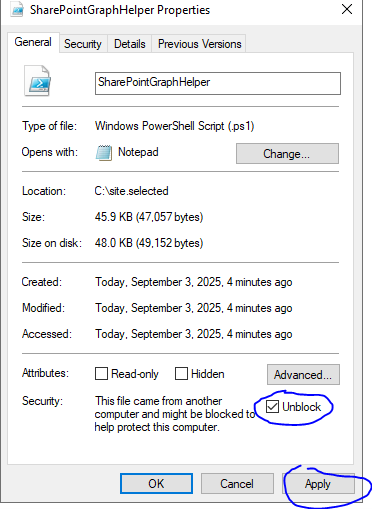
- Check Unblock and click apply.
- Then run the script again.
Using the Permission Helper
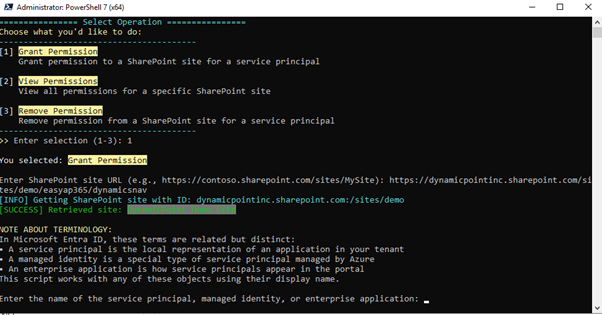
- The following options will be presented:

- To grant Full Control role we should choose option [1] Grant Permissions:
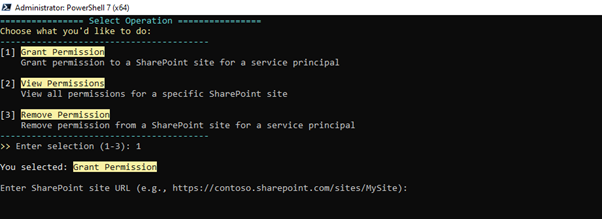
- The script will ask for the URL of the site collection to which we need to provide the Full Control role:
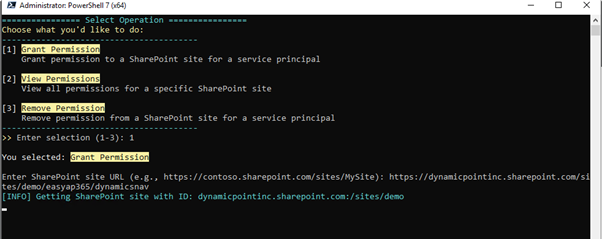
- Once you provide the URL, the script may ask to authenticate again for SharePoint access:
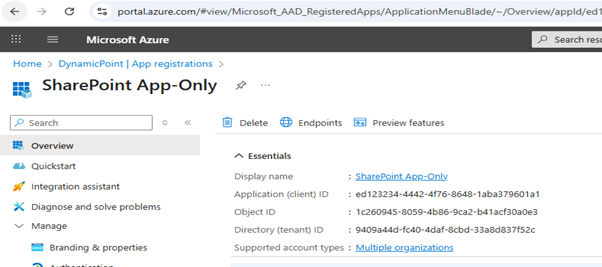
- Now the script will provide some information and then will ask for the display name of the app registration which is used by EasyAP365 or EasyEXP365 applications:
- Get the display name for the app registration from Azure portal by going to App registrations -> Your app registration. Use the display name on the top of the Overview page:
- Once you provide the display name of the app registration, the script will ask for the scope we need to grant to the app registration:
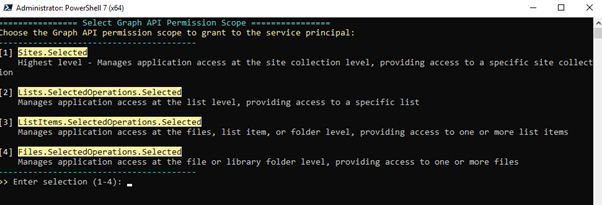
- Choose [1] Sites.Selected
- The script will then ask for the role:
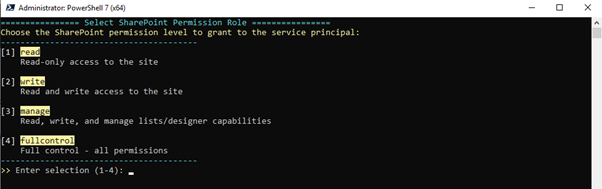
- Choose [4] fullcontrol
- The script will provide some details on the operations it will perform and will ask for confirmation:
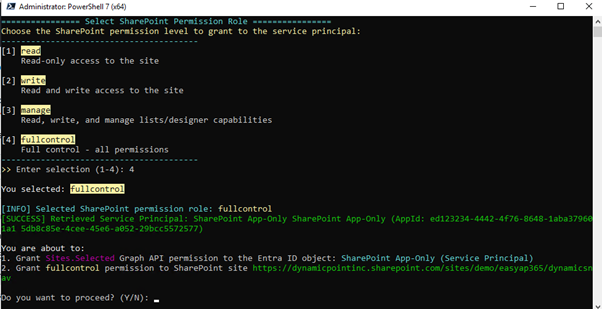
- Type Y.
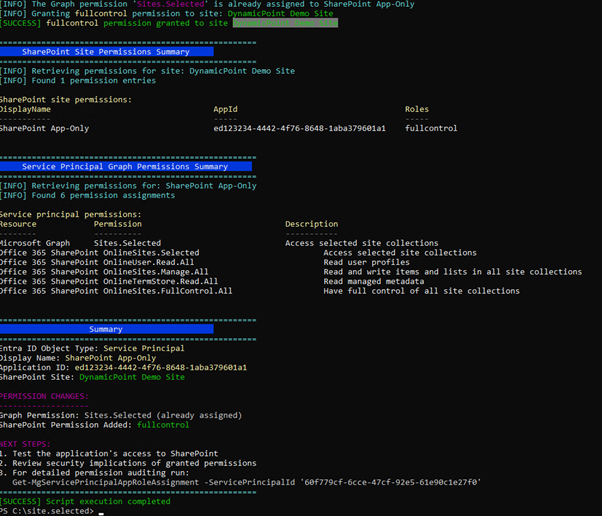
- The script will provide details on the completed operation and will exit to the console.
Notes
- Once you connect with this script, credentials are cached and you are not asked to sign-in again on each new run of the script. If you need to make changes in Azure, which may reflect the token, that is being issued by Azure, run the following command: Disconnect-MgGraph
On the next script run you will be asked to sign-in again, and the script will acquire a new token. - It is possible to create multiple app registrations in Azure with the same Display name. If the app registration you are passing to the script has a duplicate with the same name, the script will error. You need to change the display name of the other app registration(s) and try again.